
Last updated November 17, 2026
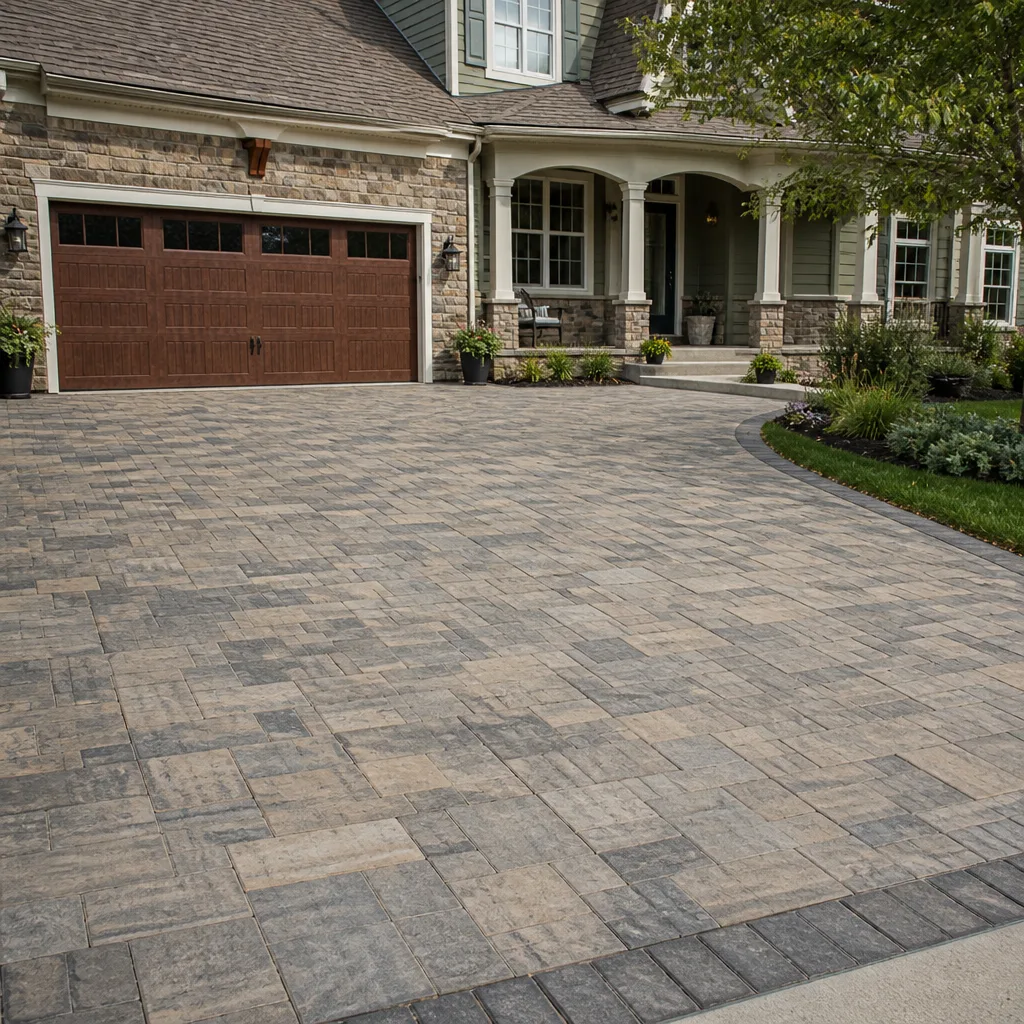 Driveway & pavers
 Kitchen remodeling
 Bathroom remodeling
 Home additions & ADU
 Roofing
 Windows & doors
 Fence
Free written scope consultation - allowances, timeline, and change-order rules on paper before a single trade is scheduled
Driveway & Pavers Maintenance Checklist for Vacaville Homeowners
Most driveway paver failures in Vacaville don’t start with the pavers. They start in the joints. The polymeric sand that was supposed to lock everything together wasn’t built for surface temperatures that push past 100°F for weeks at a stretch, and by year four or five you’re looking at chalky, crumbling joints, sand washing into the storm drain, and weeds colonizing the gaps. Guides written for cold climates obsess over freeze-thaw and plow damage. That’s not our problem here. Ours is heat, dry air, and a mild wet season that arrives just in time to stress everything the summer baked. This checklist walks you through a full year of maintenance calibrated to the Vacaville climate, tells you which products actually hold up, and flags the point where a DIY weekend turns into a job for a professional.
Quick Answer
Maintaining driveway pavers in Vacaville comes down to four seasonal tasks: re-sanding joints when the polymeric sand turns chalky or washes out, sweeping and rinsing before the rainy season, checking for sunken or heaved sections after winter, and sealing on a schedule that matches your paver material – roughly every two to three years for concrete pavers, longer for natural stone and clay brick. Polymeric sand rated for sustained high surface temperature is the single biggest lever on how long your driveway lasts.
Styles & brands we work with
- Kitchen remodeling
- Bathroom remodeling
- Home additions & ADU
- Roofing
- Windows & doors
- Driveway & pavers
- Fence
Table of Contents
- Why Vacaville Driveways Age Differently
- The Season-by-Season Checklist
- How to Spot Polymeric Sand Failure Early
- Joint Sand Products That Hold Up to Central Valley Heat
- Sealing Schedules by Material: Concrete, Stone, Clay Brick
- Weed Pressure, Dry Base, and What It Tells You
- DIY vs. Contractor: Where the Line Sits
- What Maintenance and Repair Typically Cost in Vacaville
Why Vacaville Driveways Age Differently
National paver-maintenance advice is written for a climate that barely exists here. Most of it assumes repeated freeze-thaw cycles, snow load, road salt, and spring thaw. Vacaville gets none of that. What we get instead is a long, hot dry season that does its damage in slow motion, followed by a mild wet winter that finds every weakness the summer created.
The mechanics are simple once you understand them. Paver joints are a flexible system. The sand in the joints is meant to stay slightly pliable so it can absorb the small movements of a paving surface under tire load. Heat changes that. When the surface sits above 100°F, the binder in a standard-grade polymeric sand softens, cures too fast, or simply gives up. It turns from a firm, slightly rubbery plug into something that looks like chalk and behaves like dust. Once the joints lose their fill, two things happen at once: the pavers start to shift against each other under traffic, and water finds a path straight down into the base.
Vacaville’s dry air makes the problem worse in a way that surprises homeowners. Low humidity pulls moisture out of the sand and base aggressively, so a poorly compacted or under-watered joint cures to a weak, crusty finish even on a proper installation. Then the wet season arrives, saturates the base, and the first cold snap contracts everything. Sunken sections, wobbly corners, and sand disappearing downstream are the classic result.
The housing stock matters too. Vacaville runs from older ranch homes in the older core near downtown to newer construction in the expanding subdivisions on the north and east sides, and the driveways were built across decades with different base prep, different edging, and different drainage assumptions. A maintenance plan that works for a 2019 driveway on a graded slope does not automatically suit a 1970s driveway that drains toward the garage. The checklist below assumes the climate, not a particular era of construction, and you should treat it as a starting point you tune to your own slab.
The Season-by-Season Checklist
The single biggest maintenance mistake we see is treating paver care as a spring-cleaning task. In Vacaville, the work splits into four distinct windows, and each one has a specific job. Miss one and you hand the next season a problem it didn’t need.
Spring (March through May): inspect and repair
- Walk the full driveway and mark any paver that rocks underfoot, sits proud, or has dropped below the surface.
- Check the joint sand depth with a screwdriver or thin blade. If joints are more than about a quarter-inch below the paver face, you have sand loss to address.
- Look at the edging on both sides. Edging that has shifted outward is a leading cause of spread at the edges.
- Pressure-wash or scrub the surface to remove the winter’s dirt and biological growth, then let it dry completely before touching the joints.
Summer (June through September): protect the joints
- Re-sand any joints that washed out over winter, using a sand rated for high surface temperature. This is the season to do it, because the joint needs to cure through dry weather.
- Pull weeds early. Once a weed roots into the base through a failed joint, pulling it takes some of the joint fill with it.
- Inspect for thermal expansion gaps at the driveway apron, against the garage slab, and where the driveway meets a sidewall. Loose or missing expansion material causes pressure that lifts pavers at the edges.
- Avoid heavy static loads, like a trailer parked in one spot for weeks, on freshly re-sanded joints.
Fall (October through November): prep for rain
- Sweep the entire surface and clear debris from drains and swales, so the wet season arrives with clear paths for water to leave the driveway.
- Top off any joints that opened during the dry season, then compact the sand into the joints.
- Wash the surface and check that water still runs off. Standing water after a rinse is a grading problem, not a cleaning problem.
- If you’re on a sealing cycle, this is the window: after the heat has broken but before the wet season sets in.
Winter (December through February): monitor
- After the first heavy rains, walk the driveway looking for new sunken sections or heaving.
- Check for sand accumulation at the low end of the driveway or in the storm drain. That tells you the joints are losing fill.
- Keep the driveway free of soil and leaf buildup. Wet organic debris over a paver surface traps moisture against the joints through the rainy weeks.
This is also the season to look at the whole property rather than just the driveway. If you’re planning to refresh the front of the house, coordinating your driveway & pavers work with new fence installation in the same wet-season window saves you scheduling headaches, because both jobs share the same soil prep and grading considerations.
How to Spot Polymeric Sand Failure Early
Polymeric sand fails in a predictable sequence, and catching it at stage one is the difference between a bag of sand and a re-grade. Watch for the warnings in order:
- Texture change. The joints go from a firm, slightly dark fill to a light, chalky, sandy look. Rub a fingertip across a joint: if it crumbles into loose powder, the binder is failing.
- Visible joint depth. Healthy joints sit close to the paver face. As sand washes out, you see a clear trough between pavers, often an eighth to a quarter inch deep.
- Weed emergence along joints. Weeds need a path to soil. When they start appearing in a line along a joint, that joint has lost its seal.
- Paver movement. A single paver that rocks or sits out of plane signals that the sand fill and possibly the bedding layer are compromised, not just the surface joint.
- Sand at the low end. Loose sand collecting at the bottom of the driveway or washing past the apron after a rain is joint fill that is leaving the system.
The misdiagnosis we see most often is treating chalky joints with a fresh skim coat of cheap sand. That’s a temporary patch. Once the binder has broken down, the proper fix is to clean out the failed fill, then re-sand with a product built for high surface temperature, compacted properly and watered according to the manufacturer’s cure instructions. If the pavers themselves are moving, the problem is below the surface and no amount of surface sand will fix it.
Joint Sand Products That Hold Up to Central Valley Heat
Not all polymeric sand is built for a Vacaville summer. Products formulated for cold climates can work fine in a Michigan drive but cure brittle and chalky here, because the temperature window they’re designed around is wrong. When you’re shopping for joint sand, look for these qualities:
- Explicit high-temperature rating. The technical data sheet should specify the range of surface temperatures the product is rated for. If it doesn’t mention heat at all, assume it’s not rated for it.
- Flexible binder chemistry. Polymeric sand with an acrylic or hybrid binder that stays slightly pliable under high heat holds its fill better than a rigid cement-like binder, which cracks instead of flexing.
- Fine-graded formula sized for narrow joints. Standard-grade sand can bridge over narrow joints and leave voids beneath. Joint width determines which grade you need.
- Rain-cure or quick-cure options. Vacaville’s dry air means a quick cure is often an advantage, but you want one that doesn’t over-cure to a brittle crust.
- Fine dust-control additive. A sand that resists dust is a real benefit here, because the driveway sees dust storms on windy spring days.
Ask for the manufacturer’s technical data before you buy. A reputable distributor will have it on file and can tell you whether the product was tested for sustained surface temperatures above 100°F. That single specification separates the products that survive three or four Vacaville summers from the ones that turn to powder in two.
Sealing Schedules by Material: Concrete, Stone, Clay Brick
Sealing is where most Vacaville homeowners get into trouble, because the internet treats “seal your pavers every two years” as a universal rule. It isn’t. The right schedule depends on the paver material and, just as importantly, on what type of sealer the surface can actually absorb. Here’s how the three common paver types compare:
Concrete pavers
Concrete pavers are the most common driveway surface in Vacaville’s newer subdivisions. They’re manufactured with a controlled surface, so they take a penetrating or film-forming sealer predictably. A penetrating sealer every two to three years keeps the joints stable and the surface resistant to stains. A film-forming acrylic sealer holds up well here too, but it will need to be stripped and reapplied when it starts to chalk or flake, and in a hot climate that happens faster than the label implies. Penetrating sealers are the more forgiving choice.
Natural stone
Stone, whether travertine, bluestone, or granite, is denser and less porous than concrete. It usually doesn’t need sealing for performance, but a penetrating sealer every three to five years helps with stain resistance and color stability. Never apply a film-forming sealer to unsealed natural stone unless the surface has been tested first. Travertine is especially prone to trapping moisture beneath a film sealer, and once that happens the surface can spall or cloud.
Clay brick
Clay brick is the most forgiving paver material in this climate if it’s installed correctly. Unsealed clay brick breathes well and handles heat without cracking. If you do seal it, use a breathable penetrating sealer no more often than every three years, and expect color darkening. A film sealer on clay brick is a maintenance commitment, not an improvement, unless the brick was specified for it.
What about the “correct” season to seal?
Sealing belongs in fall, after the peak of summer and before the wet season. Surface temperature at the time of application matters as much as the product. Applying a sealer mid-summer on a hot drive causes it to flash-cure in streaks. Always check the manufacturer’s temperature window for application, and test on an inconspicuous area first. If you’re planning a larger project and want to refresh the surface at the same time as the landscaping, it’s worth talking to a contractor about how a full driveway installation compares with a re-seal in cost and longevity.
Weed Pressure, Dry Base, and What It Tells You
Weeds get treated as a cosmetic nuisance, but in Vacaville they’re a diagnostic tool. A healthy paver driveway has joints that are filled, compacted, and sealed against the base. Weeds need an open path to soil moisture to germinate. When you see weeds along a joint line, that joint has lost its fill and there’s a crack in the base layer beneath it.
The pattern of weed growth tells you where the problem is. Isolated weeds at the edge of the driveway usually mean the edging has shifted. Weeds in a line running perpendicular to the driveway suggest a joint that has opened up from expansion pressure. Weeds scattered across one section suggest the bedding layer has separated or settled there. Clover and dandelion growth is more common in the joints than on the surface, because the joint is where moisture collects after a rain.
Here’s the part most guides miss: in a low-humidity climate, base layers can dry to the point of cracking, and those fine cracks act as channels. When the wet season returns, moisture goes straight down those channels and saturates the base unevenly, which is exactly what causes sunken sections after winter. So weed growth and sunken pavers are often the same problem, one visible and one structural. Pulling the weeds is a starting point; checking the joint depth and the surface plane in the same area tells you what’s actually going on.
DIY vs. Contractor: Where the Line Sits
Some paver maintenance genuinely belongs on your weekend list. Some of it doesn’t. Knowing the difference saves you money in both directions.
Reasonable DIY tasks
- Pressure-washing or scrubbing the surface to remove dirt, biological growth, and stains. Use moderate pressure and a fan tip; too-high pressure strips the paver face.
- Sweeping and rinsing before the wet season to clear drains and debris.
- Pulling weeds and applying a joint weed-control product rated for hardscape use.
- Replacing joint sand in isolated spots where a single joint has washed out, using a properly rated product.
- Visually inspecting and marking problem areas for a contractor to look at.
Tasks that call for a contractor
- Re-grading a sunken section. If a section of the driveway has dropped, the cause is almost always in the base, not the surface. Re-lifting and re-bedding pavers requires resetting the base and compaction, and getting it wrong wastes the pavers.
- Replacing edging or restraint. The edge restraint is what keeps the whole field from spreading. Repairs require cutting back, resetting a new restraint, and re-pinning it.
- Full re-sanding. Doing this properly means removing the failed fill from every joint, re-sanding with a temperature-rated product, compacting it evenly, and controlling the cure. It’s a lot of surface area and an experienced hand gets better results.
- Sealing a large driveway. Application consistency determines whether a sealed driveway looks even or streaky, and a professional will usually get a better finish.
- Any diagnostic question. If you don’t know why a section is failing, a professional can look at the base, drainage, and edging together and give you a specific answer.
What Maintenance and Repair Typically Cost in Vacaville
Costs vary by driveway size, material, and the scope of the repair. The ranges below are typical for the Vacaville market and are estimates, not quotes; the written estimate you get on site sets the final price.
| Task | Typical Estimated Range |
|---|---|
| Pressure-washing / surface cleaning (standard driveway) | $200 – $450 |
| Full joint re-sanding (polymeric, temperature-rated) | $400 – $900 |
| Spot re-sanding (isolated joints) | $100 – $250 |
| Sealing, penetrating type (concrete pavers) | $500 – $1,200 |
| Sealing, natural stone or clay brick | $600 – $1,400 |
| Re-leveling a sunken section (with base work) | $600 – $2,000 |
| Edge restraint repair or replacement | $300 – $900 |
| Full driveway replacement (reference point) | $8,000 – $25,000 |
The comparison row at the bottom of that table is the one we suggest you keep in mind. A full driveway replacement is a five-figure project in most Vacaville neighborhoods. A well-timed re-sanding and sealing cycle extends the life of the pavers you already have and costs a fraction of a replacement. That’s the entire argument for keeping up with maintenance rather than waiting for failure.
If you’re planning a larger exterior project, the same contractor can often handle the driveway alongside other work, which is worth factoring into your budget conversation. Brand choice matters too: quality pavers from manufacturers like Belgard, Unilock, and Techo-Bloc are engineered for a specific installation system, and matching the joint sand and sealer to the paver manufacturer’s specification is a real performance decision, not just brand loyalty.
Common Mistakes to Avoid
- Using cold-climate polymeric sand in Vacaville. A product built around freeze-thaw performance often cures brittle in our heat and turns chalky before its first anniversary. Read the temperature rating before you buy.
- Sealing too often, or at the wrong time. Sealing every year shortens the life of a film-forming sealer and can trap moisture. Sealing on a hot midsummer afternoon causes streaks. Match the schedule to the paver material and the season.
- Patching a sunken paver with surface sand. If a paver is out of plane, the problem is underneath. Sand over the top hides the symptom and delays the repair.
- Pressure-washing too hard. High pressure strips the paver face and cleans out the joint fill at the same time, which accelerates the very wear you’re trying to prevent.
- Letting weeds root before removing them. A weed that has taken hold in a joint pulls the joint sand out with it. Pull it early, and inspect the joint afterward.
- Ignoring winter washouts. Sand at the bottom of the driveway after a rain is a signal, not just debris. Treat it as a call to check joint depth.
- Skipping the fall sweep. Clearing drains and swales before the wet season is the single cheapest insurance against spring repairs.
See the difference
 Before
 After
 Before
 After
 Before
 After
When to Call a Professional
Call a professional when the problem is structural rather than cosmetic. That means: pavers that rock or sit out of plane, a section that has visibly sunken, edging that has shifted or lost its restraint, or a surface that holds water after a rain. It also means a driveway where weeds are showing up in lines and joints keep losing sand even after you’ve re-sanded them, because that combination usually points to a base issue no amount of surface work will solve. Our technicians have up to 10 years of experience reading these failure patterns, and they can tell you in a site visit whether you’re looking at a maintenance job or a structural repair.
Construction Vacaville offers free estimates in Vacaville. Call (877) 350-4314. We answer 24/7. Fast dispatch from 7am to 7pm, Sunday through Friday. If you want to think beyond the driveway, the same team handles the full exterior, from hardscape to fence installation and Construction Vacaville service lines across the property.
Frequently Asked Questions
Plan on a full re-sand every two to four years, with spot repairs in between. Vacaville’s high summer surface temperatures break down standard polymeric binders faster than colder climates do, so if your joints look chalky or you’re finding sand at the low end of the driveway after rain, it’s time. Temperature-rated sand and a proper compaction will stretch that interval. Call (877) 350-4314 for a free estimate on re-sanding.
A penetrating sealer is the more forgiving choice for concrete pavers in this climate. It keeps joints stable and surface stain resistance high without the stripping and flaking cycle of a film-forming acrylic. Apply it in fall after the heat breaks, and check the manufacturer’s application temperature window. Estimates for a full seal are free; call (877) 350-4314.
Weeds in a line along a joint mean that joint has lost its fill and there’s a path to the base for moisture and seed. It’s a sign of polymer failure or base movement beneath that line. Pull them early, then check the joint depth; if the fill is gone, a re-sand will solve it, and if the pavers are also moving, that’s a base repair. Call (877) 350-4314 for an assessment.
It’s not a good DIY project, because a sunken paver is almost always a base problem. Lifting the pavers, re-compacting the base, and re-bedding them takes the right tools and experience, and doing it wrong wastes the pavers you already own. This is one of the spots where a contractor visit saves money. Call (877) 350-4314 for a free estimate.
Not for performance. Both materials usually perform fine unsealed in Vacaville’s climate. A breathable penetrating sealer every three to five years helps with stain resistance and color stability, but film sealers can trap moisture and cause spalling on stone. Test on a small area first, or have a contractor check the surface before sealing. Call (877) 350-4314 to talk through options.
Cleaning typically runs $200 to $450, a full joint re-sand $400 to $900, and sealing $500 to $1,400 depending on material and size. Re-leveling a sunken section with base work starts around $600 and up. These are estimates; the written quote sets the price. Call (877) 350-4314 for a free estimate.
The Bottom Line
Paver maintenance in Vacaville is about heat, joints, and timing. The pavers themselves are durable; the joint sand is what fails first, and it fails fastest when the product isn’t rated for sustained surface temperatures above 100°F. A fall sweep before the wet season, a spring inspection for movement and sand loss, a fall re-sand and seal on the schedule that matches your material, and early weed removal are the core of a maintenance plan that keeps the driveway you have rather than replacing it. When the problem moves from surface to structure, that’s the point to call a professional. We handle driveway pavers from the base layer up, and we’re happy to look at the driveway alongside the rest of your exterior.
Call (877) 350-4314 for a free estimate. We answer 24/7. Fast dispatch from 7am to 7pm, Sunday through Friday.
Whether you’re planning a full hardscape refresh or a phased exterior upgrade that includes home additions & ADU work, one team can coordinate the whole property from the driveway to the roofline.
Written by the team at Construction Vacaville.